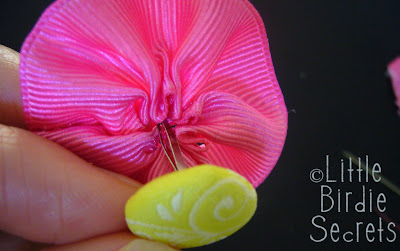
Tutorial: make ribbon flowers

It's day 2 of Flower Week, and we've got one of our quickest projects ever for you! Ribbon flowers are super simple to make, and they can be used for so much! I've been using them mostly for cards lately, but they are perfect for little girls' hair clips, headbands, purses, onesies or girls' t-shirts, well you get the idea. You can do a LOT with them.
Ribbon Flower Tutorial

What you'll need:
*Piece of ribbon, 4-6" long (depending on your desired finish size)
*Needle and matching thread
*Button or brad for the center (optional)
*Scissors
1. Thread your needle and tie a knot at the end of the thread. Starting at one end, do a running stitch along length of ribbon.


2. When you get near the end, pull on the thread to bunch up your ribbon.

3. Back stitch with your needle a few stitches to secure.

4. Fold ribbon around to make a complete circle. Hold ends together with tails pointing down.

5. From the back side, stitch up the tails to close your circle. Stitch back down and secure with knots.


6. Cut off tails close to stitching.

7. Insert a brad, or sew on a button to create the flower's center.

8. You have a ribbon flower! Make your gathers as tight or loose as you want. It all depends on the look you want.

Then you can attach it to a card like I did here. Inspiration for this card came from the fabulous Kristina Werner and today's MACM.


Here are some other examples of ribbon flowers on cards. These have button centers.


And this one has a rhinestone brad center. The ribbon flower actually makes up the center of one of our little crocheted flowers from this tutorial.


Sorry Summer, you're not going anywhere. These little cuties are going to be around all winter!
little birdie secrets
Không có nhận xét nào:
Đăng nhận xét